Wood flooring installation is an investment that not only adds timeless beauty to your home but also increases its value. Whether you are renovating a single room or updating the entire house, wood flooring offers a classic and durable option for any space. However, the process of wood flooring installation involves several important steps, from choosing the right wood type to ensuring a smooth finish. This guide will walk you through everything you need to know before embarking on your wood flooring installation project.
Why Choose Wood Flooring?
Wood flooring is a popular choice due to its natural aesthetic and long-lasting quality. It works well in almost any room, offering a sophisticated yet warm look. Moreover, wood floors are easy to maintain and clean, making them an ideal option for busy households. The diverse range of wood species and finishes ensures that you can find a style to suit your home decor, whether you prefer a rustic or modern ambiance.
Types of Wood Flooring
When it comes to wood flooring installation, you have a few options to choose from. The main types of wood flooring include:
- Solid Hardwood: This type is made from a single piece of wood and is extremely durable. It can be sanded and refinished multiple times, ensuring that it lasts for decades.
- Engineered Wood: Composed of multiple layers, engineered wood offers more stability and resistance to moisture than solid hardwood. This makes it an excellent choice for basements or areas with higher humidity.
- Laminate Wood Flooring: Although not made of real wood, laminate flooring mimics the look of hardwood at a fraction of the cost. It is durable and easy to install, making it a great choice for DIY projects.
Preparing for Wood Flooring Installation
Proper preparation is crucial for a successful wood flooring installation. The first step is to ensure that the subfloor is clean, dry, and level. Any imperfections in the subfloor can affect the quality and longevity of the wood flooring. You should also allow the wood planks to acclimate to the room temperature for at least 48 hours before installation to prevent expansion or contraction after installation.
Step-by-Step Installation Process
Here is a breakdown of the essential steps involved in wood flooring installation:
- Measure the Room: Accurately measure the area to determine how much wood flooring you need. It is always best to purchase extra planks to account for mistakes and future repairs.
- Prepare the Subfloor: Remove any old flooring, nails, or debris from the subfloor. If the subfloor is concrete, you may need to install a moisture barrier to protect the wood from damage.
- Install the Underlayment: If required, lay down an underlayment to provide additional cushioning and insulation.
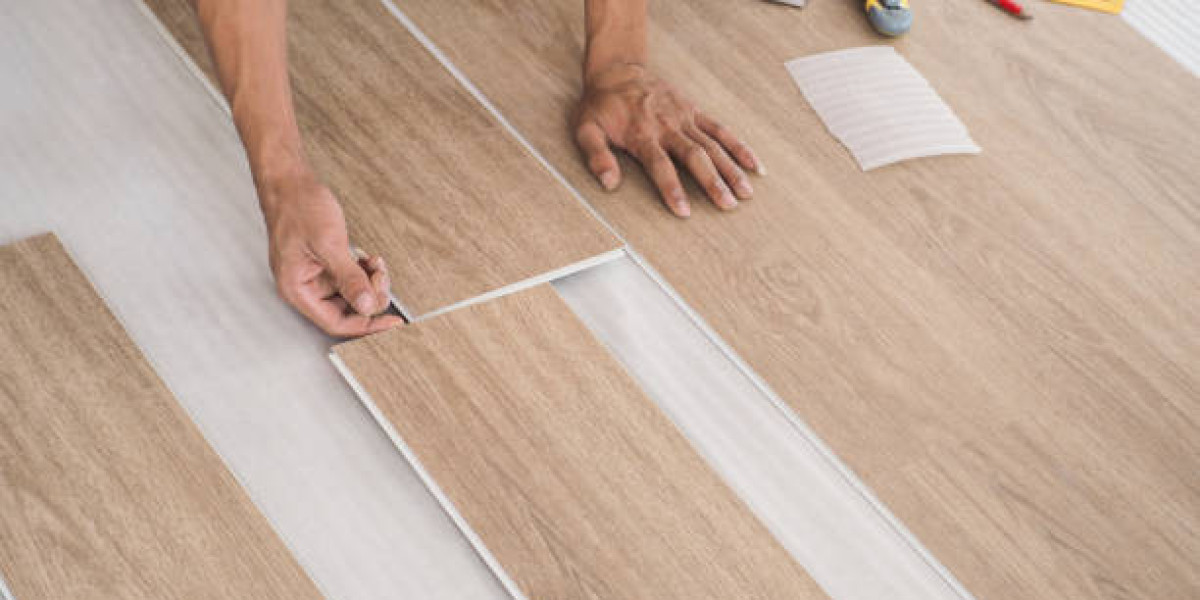
- Begin Laying the Planks: Start at the longest wall of the room and work your way out. Most wood floors use either a tongue-and-groove or click-lock installation method. Be sure to leave a small gap around the edges to allow for expansion.
- Cut the Planks: As you reach the end of the room, you will likely need to cut the planks to fit. Use a saw to make clean, precise cuts.
- Finish the Floor: Once all the planks are installed, secure them with nails or a flooring stapler if necessary. Apply a finish or sealant to enhance the appearance and durability of the wood floor.
Common Challenges and Solutions
During wood flooring installation, you may encounter several challenges. These may include:
- Gaps Between Planks: Ensure that the planks are properly aligned and snug. If you notice gaps, you may need to use a tapping block to shift the planks into place.
- Expansion Issues: If the wood expands or contracts due to temperature fluctuations, it can cause the floor to warp. Ensure that there is enough space around the edges to accommodate expansion.
- Uneven Subfloor: An uneven subfloor can cause your wood flooring to shift or creak. If this is the case, you may need to level the subfloor before installation.
Maintenance Tips
To keep your wood floors looking pristine, regular maintenance is required. Dust and dirt can scratch the surface, so sweeping or vacuuming regularly is essential. Use a damp cloth to clean up spills immediately, and avoid using harsh chemicals that could damage the wood finish. Periodically, you may want to reapply the finish or varnish to maintain its shine and protect the floor from wear.
Conclusion
Wood flooring installation is a rewarding project that can dramatically enhance the appearance and feel of your home. By carefully selecting the right type of wood and following the proper installation steps, you can achieve a durable and beautiful floor that will stand the test of time. Whether you opt for solid hardwood, engineered wood, or laminate, the results will surely make a lasting impact. Keep in mind the importance of preparation, installation techniques, and maintenance to ensure your wood floors remain beautiful for years to come.