QuickBooks stands as a reliable and robust accounting software choice. Whether managing a small business or a larger enterprise, QuickBooks holds its reputation as a top-notch accounting tool. It efficiently handles business, accounts, payroll, taxes, and more, offering valuable assistance for smooth business operations. This blog provides details about the process of setting up folder and Windows access permissions to share of company files. Occasionally, users might encounter obstacles when launching the QB software, stemming from technical glitches. These issues can hinder software access. This write-up also provides insights into tackling such issues and offers guidance on essential setup steps. You can contact our tech support team if you face such issues in QuickBooks. To contact us just dial +1-888-351-0999 and you will be connected to our expert staff and will be provided by immediate assistance.
Setting Up Folder Permissions: A Step-by-Step Guide
To ensure your permissions are correctly configured, follow these steps.
- Open Windows Explorer and find the file or folder you want to adjust permissions for.
- Right-click the folder, then select Properties.
- Click on the Advanced option in the security tab.
- To add a new access control setting, check the Add
- Ensure the following settings are allowed:
- Traverse Folder/Execute File
- List Folder/Read Data
- Read Attributes
- Read Extended Attributes
- Create Files/Write Data
- Create Folders/Append Data
- Write Attributes
- Write Extended Attributes
- Read Permissions
- Add the relevant users, computers, or groups by checking the Add box, then click OK.
- To remove an access restriction, click Remove.
- Edit group support by selecting the user/group and using checkboxes in the Permissions pane.
- Click OK to accept changes, Cancel to discard changes, or Apply to implement changes without locking file/folder properties.
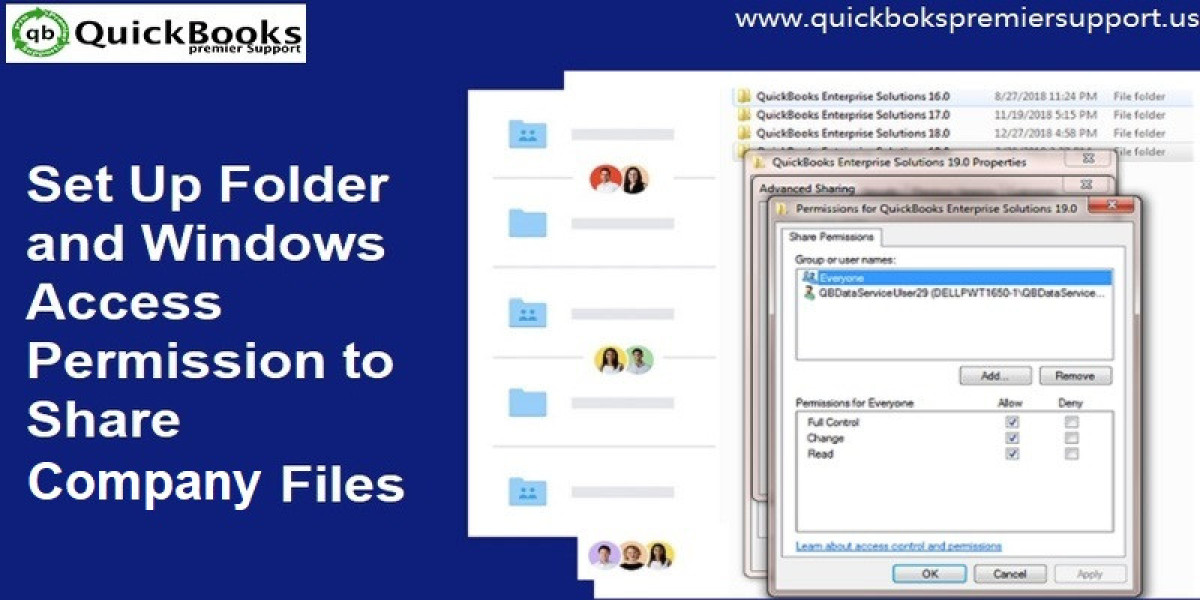
Setting Up Windows Access Permissions for Sharing Company Files:
Ensuring QuickBooks has proper access is vital for smooth company file sharing. Here's a simple method.
On Windows 10, 8, and 7:
- Press Windows+R keys to open File Explorer.
- Right-click your company files folder, select Properties Sharing Share Add.
- Choose the appropriate QBDataServiceUserXX for your version.
- Set both users' permission level to Full Control and click Share.
On Windows 8.1:
- Choose the folder, click Share.
- Proceed to Advanced Security.
- Click Add, then select a principal.
- Navigate to Advanced Find Now.
- Select the user, click OK.
- Click Full Control and OK.
On Windows Server 2012:
- Confirm File and Storage Services are installed.
- Press Ctrl + R, enter Server Manager, press Enter.
- Choose File and Storage Services and click Shares.
- From the drop-down, select New Share.
- Pick SMB Share – Quick.
- Choose Type a custom path then Browse to locate the folder.
- Select the appropriate folder.
- Click Select a folder Next.
Read Also : quickbooks error 6010
Wrapping Up:
For an even more prosperous business, we strongly recommend utilizing QuickBooks Enterprise, the exceptional accounting software. This article aims to provide comprehensive insights into configuring Folder and Windows access permissions for sharing QuickBooks company files. We believe that the steps outlined here will simplify your tasks effectively. If you have any questions, please don't hesitate to reach out to us via our QuickBooks Desktop Support number +1-888-351-0999. Our certified Pro Advisors are available around the clock to assist you. Feel free to connect with our team at any time for resolving your queries.