How to Draw A Jellyfish. Jellyfish have smooth, gelatinous, bell-shaped bodies and long tentacles lined with stinging cells.
Also, check our Free Lizard Coloring Pages.
Here's a fun fact about jellyfish: Did you know that jellyfish aren't classified as fish? They are vertebrates that live underwater.
The jellyfish is often characterized by its glowing, transparent skin and unique appearance, making it an attractive subject to draw on.
However, due to their complex and intricate characteristics, it can be difficult to capture the beauty of a jellyfish on paper perfectly. Luckily, we've nailed a step-by-step guide on how to draw a jellyfish. This tutorial consists of 9 easy steps.
Also, each step is accompanied by detailed illustrations that serve as a visual guide and make drawing a jellyfish a lot easier!
How to Draw A Jellyfish
Step 1
Starting at the top of the paper, draw a downward curved shape to outline your jellyfish's hood.
If drawn correctly, it should look like a three-quarter circle, as shown in the image.
It cannot be easy to draw this shape freehand. So don't hesitate to use a pair of compasses to help you refine the outline.
A compass is a drawing tool that allows you to quickly and easily draw a perfect circle. If using a compass, draw a circle and erase the bottom line of the quarter.
Step 2
Complete the jellyfish's body by drawing more connected curved lines under the hood outline we drew in the previous step.
After completing this step, the outline of your jellyfish's body should now be closed, making it whole and complete.
Step 3
Draw the first tentacle under your jellyfish's body.
The tentacle tip looks best when rounded, as shown in the image. But you can also make it spiky if you want!
Step 4
Repeat the previous step on the opposite side to shape the second tentacle of your jellyfish.
Make sure you leave a gap between the two tentacles to make enough room for the center tentacle that we will draw in the next step.
Step 5
To create the tentacle between the first two tentacles we drew in the previous steps, draw an upward curved line below that converges with the lines of the other two tentacles.
Because of the two tentacles on either side, it makes sense that only the tip of the central tentacle is visible.
Step 6
Draw another tentacle on the far left under the jellyfish hood to create the fourth tentacle.
Step 7
Repeat the previous step on the opposite side to create the fifth and final tentacle.
Once this step is complete, all of your jellyfish's tentacles should now be ready!
Step 8
One of the distinguishing features of the jellyfish is the circular patterns all over the surface of its body. That's what we're going to work on in this step.
Draw several lateral oval shapes of different sizes all over the jellyfish's body.
There is no perfect place to place these patterns. So feel free to draw them anywhere, as long as they are on the surface of the jellyfish's hood or body!
Step 9
Give your jellyfish a happy expression by giving them a pair of sparkling eyes and a big smile!
Create the eyes by drawing two circles in the center of the jellyfish's face. Next, draw a small circle in each eye. Next, shade all of the eyes except for the small circle inside them to make the eyes appear to glow.
Now, to complete your jellyfish's facial features, draw an upward sweeping line under the eyes to create a wide smile.
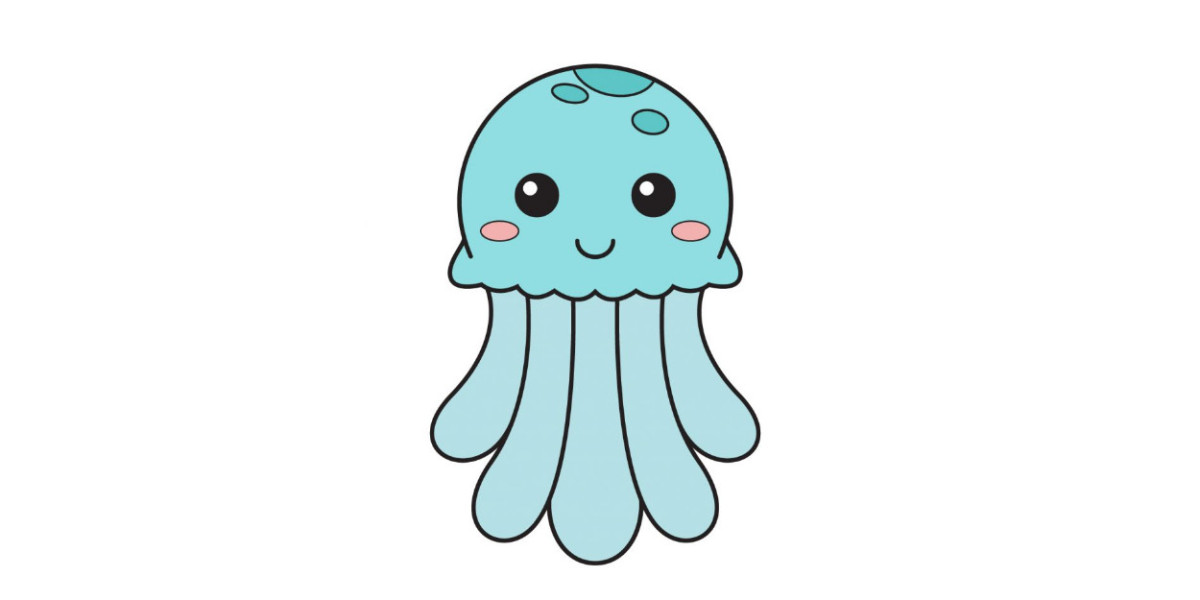
And that's it - you have completed the drawing of a jellyfish. Now you only need a touch of bright colors to make your jellyfish colorful!
Now that we have successfully drawn an adorable jellyfish, it's time for the most fun and exciting part - choosing colors and coloring in your drawing!
This is the part where you can show off your artistic skills and your ability to combine different colors.
Most jellyfish are light or transparent.
Have fun coloring your drawing, and see the jellyfish finally come to life!
Your Jellyfish Drawing is Finished!